In this post, I'm going to explain all the things about PyQt5 GUI buttons. You can get an idea of what is PyQt5 and what it can do by reading the Application development with Python GUI Packages post. We also learned about installing the PyQt5 package to python and basic window creating using the PyQt5. In this post, we are talking about a few topics related to Buttons
1. Creating a Push Button in PyQt5
2. Adding image Icons to Push Buttons
3. Adding CSS transition effects to Push Buttons
4. Adding Animation and element effects to Push Buttons using CSS
How To Create a Simple Button Using PyQt5
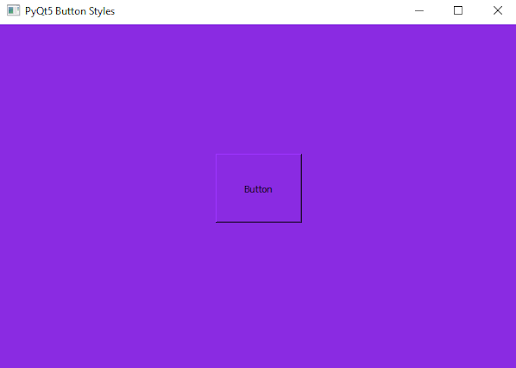
We can make a button in PyQt5 using the "QPushButton('Text to display', self)" function. You can learn more about it by referring to the below code. Also, we adjust the button placed inside the window using the "setgeometry()" function.
This is how the output looks like,

How To Add CSS Styles to Button in PyQt5
In the above step, we create a normal PyQt5 button. Now let's see how to add attractive styles to the button we create. We are using "setStyleSheet()" function to make a CSS format script. You can write your CSS styles inside the (""). Here are some CSS examples I used in my program. You need to keep in mind that I'm explaining CSS codes in a separate function to understand clearly.
Note: You might need to put a semicolon (;) after each CSS style.
setStyleSheet("background: #FF1493;") -- I add this to add a background color to the button. Also, you can put a color in Hexa values or RGB values. You can get them by searching for CSS colors on google.
setStyleSheet("color: #000;") -- I add color CSS function which used to put a text color in CSS.
setStyleSheet("font-size: 20px;") -- You can use this to set a font size, also the easiest way to put a size value is px (pexels)
setStyleSheet("border: 1px solid #000;") -- You can use this to set a border to your button. In here you can adjust the border size with pixels the same as the color. Here I'm using a solid border. It means my border is like a line. But you also have other options which are dashed border and dotted border.
Here how they appear like;
setStyleSheet("border: 1px dashed #000;")
setStyleSheet("border: 1px dotted #000;")
This is how the output looks like,
How to add Transition Effects to Button
Adding Click Pointing Hand Effect...
In the above we make the button with some attractive effects, If you try the above steps you'll see that our button shows just the arrow cursor when we tap it. So we can adjust it like below.
setCursor(QCursor(Qt.PointingHandCursor))
You can check the below full code in your Python IDE to get the real experience.
Adding CSS Hover Effects...
Here I just modify some codes in the CSS effects function. I'm sure you can get an idea by the below code.
self.my_button.setStyleSheet("*{background:#FF1493;" +
"color: #000;" +
"font-size: 20px;" +
"border: 1px solid #000;" +
"border-radius: 5px;}"
"*:hover{background: #FF8C00;}") --This is the hover effect and it is changing button background color to another color.
How to Add Image Icons to Buttons
This is the last but not least lesson I'm going to explain to you. In this part, I'm adding an image icon to the button we created.
icon = QIcon()
icon.addPixmap(QPixmap("Other-python-icon.png")) -- This is the place you need to put your image location with its format.
self.my_button.setIcon(icon)
This is the full program we created
This is how the output looks like;
You can put your comments and doubts below in the comment section, also don't forget to share this post.


0 Comments